Sunday, July 29, 2012

Editable Literacy Center Poster Pack

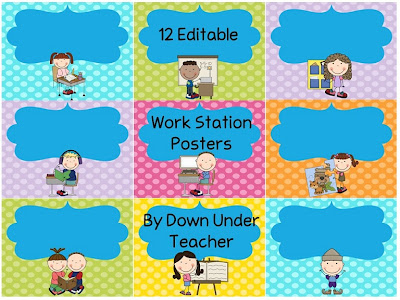
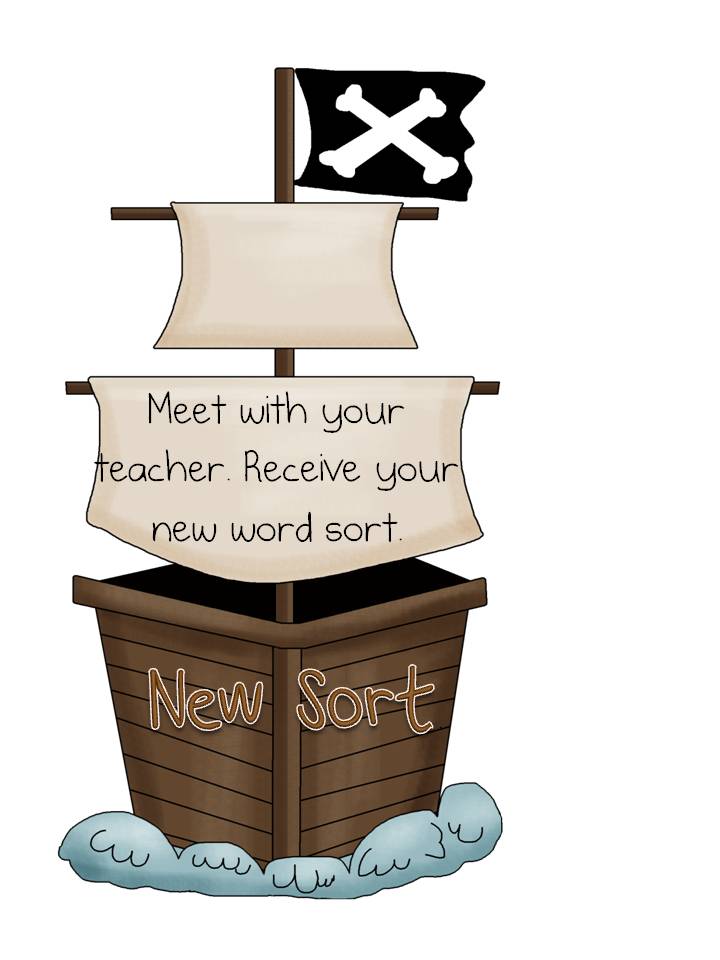
I've just finished updating an old pay item. The old file had posters, rotation cards and I-Can charts for the Daily 5. However because of copyright, sellers can't sell items that are Daily 5 specific, even though teachers have always done independent reading (Read to Self), word work (Work on Words) etc. I was just going to convert the file to a freebie, but didn't really think that was fair to all the people who bought it. So, instead I've updated the file to make it editable and not Daily 5 specific. 

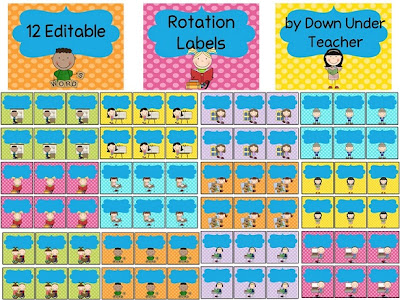
It comes with 12 posters, each with a different image, plus a page of editable rotation cards for each. Some centers you can do with the images include: independent reading, big book center, poetry/readers theatre, computer station, reading with teacher/helper, buddy reading, puzzles/games, pocket chart center, writing/sentences/reading responses, overhead center, listening post and word work.
 
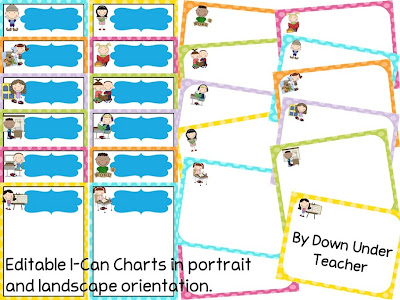
I've also included portrait and landscape I-Can Charts, which are also editable. You can use these to type up expectations or the activities that students are required to do each week. Alternatively, you can print them blank, and write in a dry erase marker what the requirements for an activity is each week (if you change them out each week/fortnight). You could just pop the chart into the tub and the expectations are right there!
So, the file is no longer Daily 5 specific, although you can definitely use this product if you use the Daily 5. If you have purchased this file before, you are able to download the updated version for free. If you want to keep the old file, don't save this one over it!

Best of all, because it's an editable PowerPoint, you can call the centers/centres anything you like and use the font and font size you prefer (handy if you have a state font you like to use). If you use the Daily 5, you can still use this pack, but just the pages you need.

It's available on TpT and Teachers Notebook.It's 20% off for the next few days.

The CAFE Headers that used to be in this pack can no longer be included in a pay item, so I've got them listed at TpT and Teachers Notebook for free. 
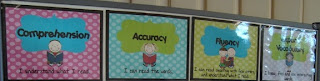
I've also added 3 more cards to the CAFE Reading Strategies Cards. You can download the updated file at TpT and Teachers Notebook.

Also, I'd appreciate it if you voted for me over at Circle of Mom's for their Top 25 Teacher Moms . You don't need to register or anything, just click on the Vote button. 

I'm off to go watch some more Olympics (I'm cutting and laminating my Olympics activity pack while watching it!). I'm thinking my laminator is going to overheat and explode with how much I've been laminating lately! My Olympics Math and Literacy pack is 20% off at the moment!

Saturday, July 21, 2012

Making Words Set Up

Wow, what a busy week! I had 4 meetings including a night of parent/teacher interviews (we have ours starting straight after school from 3pm - 7pm), we had Japanese exchange students come and visit our class for an afternoon and a very busy week with after school sports for my son and my younger brother coming to stay over for a few days. Phew!

Right now I'm still in my PJ's (and it's nearly 1pm) and loving it! I should be doing something productive but instead I've caught up on over 300 Google Reader posts and have been 'Pinteresting'. So, to try and get something done, I thought I'd post about how I set up Making Words. 

I started using Making Words when I started teaching Grade 2 a few years ago. I absolutely LOVED it and so did the kids. This year, I haven't been able to fit it in with my schedule until NOW! My school has elected to do only 1 of the 2 English units in the Queensland C2C units so we are not busting our behinds to get everything done. So, I'm left with a little more time to do things that I think work - so I'm bringing back Making Words!
 I use this book by Patricia Cunningham as a whole class activity. It comes with 100 Making Words lessons that gradually increase in difficulty. For each lesson there is a mystery word that students try and make. I set my materials up as suggested in the book. I have letter cards printed (lowercase one side and capitals on the other) and have used manila folders to make the letter holders. I have all of my materials set-up in my guided reading area (see the second shelf).
The blue drawers hold the letter cards for the kids and I to use. Mine are a larger version for the pocket chart. The pink basket holds the letter folders. Inside the basket I've also placed these aluminum trays that I found somewhere. I use them to set out the letters. I'll probably find something cuter to use soon, but they serve the purpose in the meantime. Inside the trays, I've placed the first 12 or so sorts in envelopes, so they are ready to go. These are the same ones I started using a couple of years ago - once you've set it up, you can reuse the same materials year after year.
Each of the envelopes has a different Making Words activity inside. On the front of the envelope I have all the information I need to run with the lesson (I don't need to carry the book around!).

Basically, there's 3 parts to a lesson. In Part 1, students are making words using letter tiles. They set them up in their letter holder made from a manila envelope. To get the letters, I just take the letters out of the baggie, put them in one of the trays in a row and the students just walk single file to collect the letters. I usually do this activity straight after a lunch break, so it would be set up for when they come in. They just walk in, collect the letters and go back to their desk to set it up. Takes hardly any time at all. This is what their folder looks like. I'd already have the same larger versions of the letters set up in a pocket chart that all students can see. The letters are put in the folder in alphabetical order.
Once everyone is set, I ask students to say and make a word e.g. at. The first person I see who has made the word on the other side of their folder goes up to the pocket chart and makes it with the bigger letters. 
 
I then proceed to say something like 'Add a beginning sound to make the name Pat'. Here they just need to add a 'P' to  the 'at' they already have, remembering to flip the card over to show the capital P. I always choose the first person to make it so that the lesson doesn't drag on. If a kiddo isn't able to make the word, they can look at the pocket chart version. The words increase in difficulty so that there is usually some challenge for everyone in the class. The example above was taken from the very first lesson for Grade 2. Some of the ways we change words include: 
  • Change the vowel sound to make .....
  • Rearrange the letters in ...... to make .....
  • Change 2 letters to make...
  • Use 7 letters to spell ....
  • Change the ending to make....   etc
I've already written the words on the envelope in order and I just look at them to work out what I'm going to say, rather than just reading from the book e.g. If the word they've made is 'true' and the next one I've written down is 'blue', I can see I need to ask the students to change the beginning blend. 
The lesson ends with the class trying to make the 'mystery' word that uses all of the letters - a great way to challenge the brighter kids. The mystery word above is 'planets'. 

In Part 2 of the lesson, we review the words we made. In each envelope, I've already got all of the words printed (and laminated, just because I'm like that!). We go through each card, saying what we did e.g. First we spelled 'at, a, t', we added a beginning sound to make 'Pat, P, a,t' etc. We then sort the cards, usually by word families, but also beginning sounds etc depending on the sort.
Part 3 of the lesson requires students to transfer patterns from the sort to new words. We all record the words and I add the new words on cards to the sort in the pocket chart. It's great for teaching spelling by analogy. I'd also add/review word family cards on our Word Families word wall so that all students can refer them when writing

I find the lessons take about 30 minutes, including setting and packing up. I love that it's 30 minutes where the all kids are actively involved during each stage. 

Phew, that was a long post! Have you tried Making Words before? Do you find it beneficial or does something else work better for you?

Saturday, July 14, 2012

Procedural Text Freebie

Just a quick post to to share with you a couple of things I made up today for our work on procedural texts beginning next week (because of our NAPLAN testing last week, I haven't started yet). It has some posters, labels, jumbled vocabulary matching activity and some mind maps. You can download it from Google Docs by clicking on the picture.

Also, I've reposted my Read to Someone pack (which is one of my best sellers) back on TpT. Because of copyright issues, I've changed the name of the file to Buddy Reading. I don't *think* the term 'Read to Someone' is copyrightable by The Sisters as part of their Daily 5 program, but I changed it just to be safe. The contents are not specific to The Daily 5.

Also, I'm really sorry if I haven't responded to your emails lately. I've had so many coming in it is getting very hard to keep up and they just get lost in my inbox. If you have sent me an email and I haven't responded, please email me again so it is brought to the top of my inbox!

Tuesday, July 10, 2012

CAFE Freebie and Photos

I've had lots of comments and emails about my CAFE strategy cards. Thanks for all the great comments! I've changed the spelling of 'summarise' and 'recognise' to have a 'z' instead of an 's' for those of you in the U.S. You can download them again here

The rest of this post is just a continuation of the new photos I have of my room since I had to change things around to fit in my new storage shelves. 

I moved my group area to back of the room. You can see the portable divider that I now have my CAFE board on, and I also moved my VOICES 6 Traits Writing board to the window here as well for when I have writing conferences (you can't see all of it). You can see the little toolbox that I spray painted pink as well. It's not as fancy as all the other ones I've seen, but I still think it's cute.
I've also bought some stools to go at this table, but I don't have a wrench (?) or whatever tool it is I need to put them together :( Whatever one holds the bolts on. I'll have to head to Bunnings and pick one up. I was also going to put paper and a border up that small wall like I've seen in some classrooms, but I'm not sure how to do it so it stays up for the rest of the year. I think blu-tac will start fall down by the end of the year. If you know how to make the paper stay on the wall all year - even with things stuck on it - I'd love to know!!
I've now got this itsy bitsy little reading area. The kids take the cushions and lay around the room. I've just bought new covers for them and I can't wait until I get them - they are pink, green, blue and have little owls on them.
I bought these two blue bookshelves from a cheapie shop and laid them on their sides, with one laying on top of the other. They are PERFECT for holding book boxes. I've got another two on the other side of the IWB to hold the rest of the book boxes. I bought the smaller blue shelf to hold my Daily 5 tubs.
   
I bought this new chair for my gathering area as well. I got the cushion and cover from Ikea. I'm thinking of getting a matching one for the rocking chair. On the window is my almost up-to-date Voices board which is available in my stores. I hadn't blu-tacked all of the cards up again after moving it when I took all the photos but I do like it over in this corner even though it's over 2 windows and not on a board. Sorry about the glare.

We did the Language Conventions NAPLAN test today. OH. MY. LORD, the poor little kids. I was so surprised at how hard ALL of the kids tried. So many ran out of time though and just coloured in the last of the bubbles in the last few minutes. Wish us luck for tomorrow - I think we're doing numeracy.

Monday, July 09, 2012

CAFE Strategy Cards

I've had a couple of questions and emails about my CAFE Strategy cards. 
 
I made these up quickly one day when I got tired at looking at my messy handwritten ones! You can grab them for free from my TpT store.

I actually had a great first day back today! The kiddies loved how I rearranged our room and were excited to be back. I had 7 away though! It was great just to have the 18 kids!

Sunday, July 08, 2012

Back to School Blues

I'm back to school tomorrow. The first half of this year went pretty fast! The holidays even faster!! I'm a little bummed because I didn't get as much done as I wanted to. It doesn't feel like I've had a break at all really. I also don't know how I'm going to get up tomorrow. I really am a night owl and love sleeping in. Not looking forward to a 6am wake-up call tomorrow.

I took in over 100 new books today that I contacted these holidays. I love the look and feel of a brand new, contacted book! They are just so smooth and shiny. It makes me smile (crazy I know!).

Anyway, I finally got my new storage shelves put together - I didn't realize it came as a flat pack! A few hours later it was finally put together!
I haven't finished with all the labels yet and putting stuff on top. I spray painted my black rotating reader racks - one green (you can see some of it above) and one pink. They look so cute now!
These are my new labels. I've started re-labelling everything! I'm making blue = math, pink = literacy and yellow = other (like whiteboards which can be used for multiple subjects).

Because I had to move things around to fit the new shelves in, my group area is in an area that doesn't have a bulletin board. So I've moved my CAFE board onto this portable divider so we can still access it easily from the group table. It covers up some of the ugly concertina door, so that's good!
I also had to move my VOICES Writing Traits board and other things around. I'll have pictures of that tomorrow.

I find I always end up moving things around because I am never quite happy or I end up buying new furniture and have to move things to fit it in (and I'm not just talking about tables/desks, but all the other 'stuff' like shelves, meeting area, group table etc). I really wish I didn't have to move things around at this point of the year. Do you typically set up at the beginning of the year, or do you like to move things around as the year progresses?

Monday, July 02, 2012

Word Sorting schedule bulletin board

A little while ago, I shared a word sorting schedule that I made earlier this year so that each group could see what activity they were doing on any given day. I have to admit, I didn't like it. And not just because it wasn't cutesy. As I wrote in that post, I am REALLY bad with doing our words sorts consistently-particularly when we have public holidays, excursions, assessments, special assemblies etc. I always forgot what 'day' we were on (I see one group each day, and that is their Day 1 or first activity. The following day I see another group, and that is their Day 1, but the group I had yesterday will be on their second day).  It got a little confusing.

So this is what I'm using now and I LOVE it! The activities are typed on the flower pots with a short explanation of what the kids do. I've typed up each kiddos name in their 'flower' group underneath the flower pots. They don't even actually have names, to let the kids know what activity they are doing I just hold up the flower and tell them their activity as I move their flower down the pots.
You can see above that I have 3 days when I'm not meeting with a group to introduce their word sort (I have 5 groups, but 8 activities). I meet with strugglers on these days or get in some quick reading conferences!

This board has really been a lifesaver. I've added it to TpT in case you want it. As always, it's 20% off for the first few days.

Personally, I love the flowers and the polka dot headings because the whole board is nice and bright. But I know it wouldn't fit well with everyone who has a different classroom theme, so I've made up a couple of other versions as well. I don't usually do that because I only ever post things that I'm already using in my class, but really, this board has helped me so much and it's just so EASY I thought I'd make it accessible for more people.
 
This is the pirate theme. Of course, I haven't printed these off, but this is what the board should look like. For this one, you move the pirate pictures (hat, map, parrot, chest, coins) down the pirate ships. The word sorting activity is written on the pirate ship.
 
I'm liking the look of the Hollywood theme. Wouldn't the board look really cute with a spotlight in the top right-hand corner? For this one, student names are written on the popcorn pieces and you just move the pieces down the boxes. The boxes outline the activity they are doing. 

You can check them our here: Flowers/Spring, Pirates, Hollywood/Movies at TpT. I haven't gotten them listed at TN yet, but I'll get there. I'm looking at making a jungle/money theme and perhaps an ocean/beach theme as well. If you want a specific theme made up, just let me know.

I've got to go and get ready to head into school - I'm expecting the delivery of all my new things! Yeah!

Also, on my previous post, I'm just about to add some new bloggers that you might want to check out!