I've just finished my first 'big' pack since October/November last year! Since then, I've been buying up a storm to keep my literacy and math centers going smoothly. This pack has taken me over 6 weeks to complete. I've just been making new centers when I haven't been able to find what I need in packs I've bought or downloaded. I need a lot too, because I differentiate my literacy centers. Depending on my kids needs (and how busy I am...) I have 2-3 levels of activities for Word Work, Spelling, Sight Words, Sentences and up to 5 different activities (for 5 different groups) for Write About Reading, which is my reading response center (although sometimes this is just 1 response activity that all groups complete based on their guided reading text). In the past I've done the Daily 5, but I thought my kids this year in Grade 1 needed more work on the basics. I'll do a post at some point to explain what the kids do in each one.
So this pack has 7 literacy and 7 math centers that I needed for some of the kids in my class. I apologise for my awful photos, I've been meaning to get a new camera for ages now, mine must be at least 8-9 years old now and it doesn't take great photos.
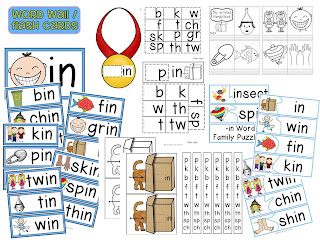
This is a sight word scramble activity, so a sight word literacy center. This was for my higher groups (they could choose whether or not to use the word guide). They chose two words to put in a sentence on the bottom (this sheet is already filled in and marked by my wonderful student teacher). My lower groups had a sight word scramble where the sight words were backed on a picture and cut up and they had to put them back together and so is self-correcting because they have the picture to help them. They needed that extra scaffold and the simpler sight words.
I had this Floating Through Sounds activity out last week for my two lower groups for a spelling center. They had to stretch out the sounds and write a letter/s in each box. It included some digraphs that needed to be placed in one box (e.g. ck, ph). It was a bit too hard for my lowest group :(
This Sundae Sound Sort has been another activity for my lowest group where they sort by medial vowel sound and write the word on the recording sheet my stretching them out. This one is for CVC words.
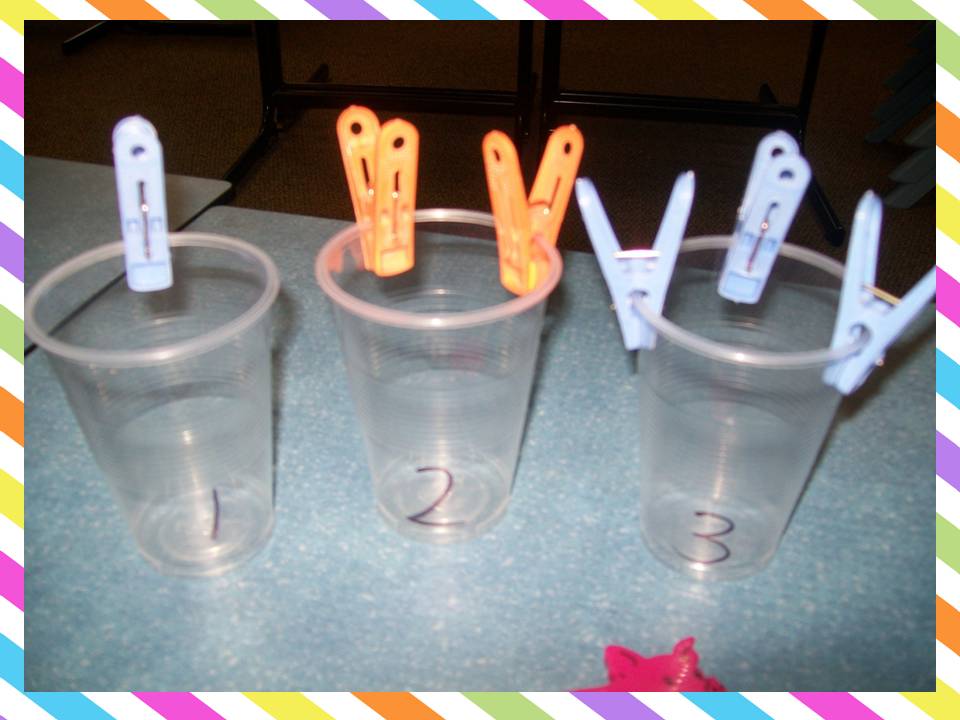
This activity I made for my middle groups as they need a little reinforcement with digraphs. They take the pegs (that have a sh, ch or th splash hot glued on them) and clip it on the card where they hear the sound (beginning, middle or end of the word).
All of the centers in this pack have an I Can chart to help students be independent at their centers. The pack comes in a zip file because it contains a U.S. spelling pack and a British spelling pack. Just delete the one you don't need. You can see I've printed the British spelling pack that has 'color' spelled 'colour'. Because most of my readers are American, I've used the American spelling of 'center' all though this post as well, even though we spell it 'centre' here in Australia! I've had some readers point out that I'm always spelling it wrong (centre) so I just thought I'd mention that we spell it differently here!
I've put this pack on TpT for 30% off for two days since I didn't have it ready for the big sale. I've only shown the preview of 8 of the 14 centers below since this post is so long. Check out the preview on TpT if you'd like for the rest.
If you've read down this far, thank you! Leave a comment below with your email address and I'll give it away to someone tonight.
My son chose number 9! Congratulations Karyn! I'll email you now!


 This was from the first week or two of school this year (you can get the Rosie's Hen pictures